Azure Follow Up – Closing It Down

It’s been a little while since I wrote about Azure.  Early on, I wasn’t sure how much I’d be focusing on using that outside of my day to day and the truth is, I haven’t touched it much since last year.  Nothing against the service, I just haven’t had a need for dedicated hosting in a while.
 
On that note, I will be shutting down my Azure resources as of today.  I’m in no rush to port what I’ve built so far to AWS, but my projects are on Github for any who are curious.  I may revisit them at a later date.
 
Even though I won’t be actively working in the Azure space for the foreseeable future, I’m still open to discussion and collaboration on the platform.  As always, if you have any questions or comments, please feel free to add them here or address them to john@benedettitech.com.

Thanks for looking in!

Deploying a project to Azure

So, now that I’ve got all the Azure resources I need for the project, it’s time to actually deploy.  Again, following the instructions at Useful Development Blog, I’ll create the necessary objects in Visual Studio and then publish them to my Azure environment.

 
First, I’ll create the Web API project.  Since the article actually called for creating the resources inline with the project creation, I’ll actually skip the step where we create the Azure app itself.  Instead, I’ll just connect to the resources that are already there once the project is created.

CreateWebAPI

 
Second, I’ll install the Angular SPA package outlined in the article.  I am a complete Angular noob but am looking forward to tinkering with the framework as a lot of developers I know make great use of it.  Angular will install several dependencies such as jQuery.  Once this is installed, you can move on to the publishing step.

InstallAngular
Lastly, we’ll actually publish the newly created app ‘To The Cloud’.  You’ll go to the Publish dialog for your project and select Azure App Service to create a publishing profile.  I’ll look for the web app node previously created and ensure that it’s available for publishing.

PublishtoWebApp

WebAppValidation

 
Then I’ll add the connection criteria for the SQL database.  Please note, you will need to go into the Firewall settings for your Azure SQL Server and add your client IP in order to use SSMS or another tool to connect directly to the DB.  This includes the dialog for setting up the connection string for the app.  Once all your settings are in place, you can click Publish.

SQLConnection

PublishPreview

The publish may take a short while but once it’s complete, you can then navigate to the site and see the results.  If you’d like to take a look at mine, you can find it at http://jkbtestapp.azurewebsites.net/welcome

Finished

As you can see, once you get the hang of standing up the basic PaaS components, it’s very easy to deploy to an Azure environment. If any of you have suggestions around deploying to Azure or have any questions or comments, please feel free to add them here or address them to john@benedettitech.com.

Thanks for looking in!

How to Provision an Environment in Azure

It’s been a while since I’ve posted so I do apologize for the lag.  I’ve been doing some experimenting with Azure in my RL job and I’d like to share a couple of lessons learned with provisioning and deploying to Azure.

I was looking for an outline on simple deployments and found a quick walk-through at Useful Development Blog. Using this outline, I’m going to provision an environment and deploy a simple web app to Azure.

The prerequisites noted in the article are as follows:

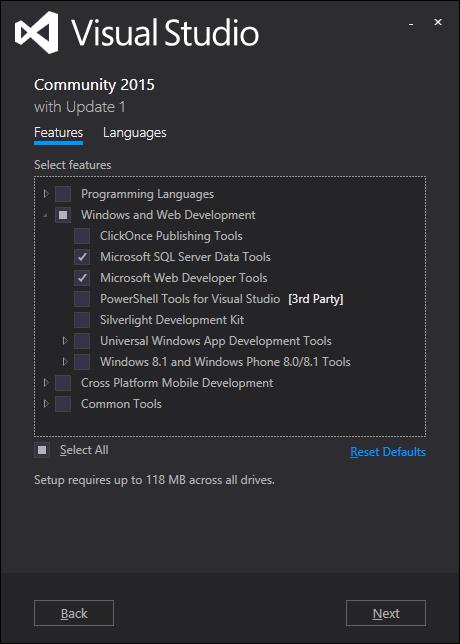
* Visual Studio 2013 (Update 3+)
* The Azure SDK (you can get that here or use the Web Platform Installer)
* an account with Azure

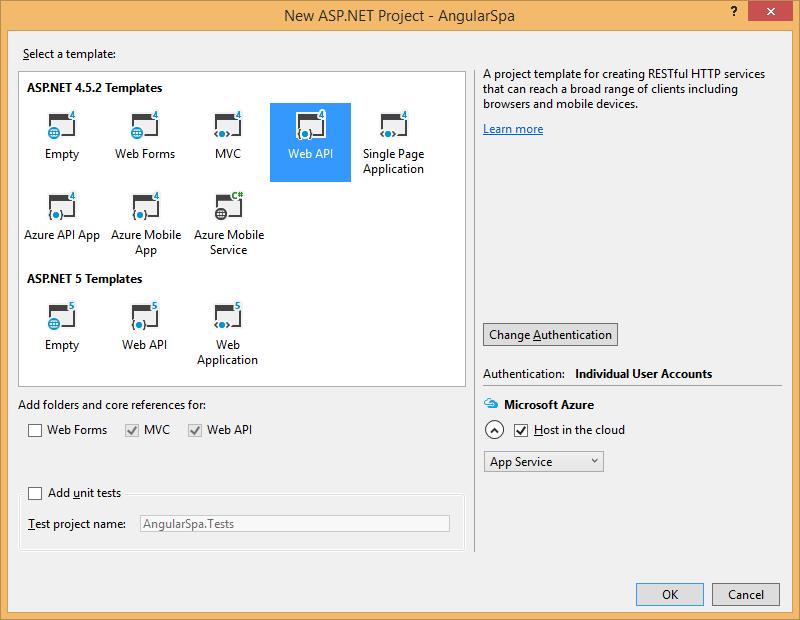
I’m going to use the tools deployed previously to accomplish the same tasks. The only difference should be that I’m using Visual Studio 2015 Community rather than 2013.  Also, i’m going to provision my environment FIRST prior to deployment.  While you can automatically let Visual Studio create the necessary Azure nodes automatically in order to host your app, I feel that it will be necessary to know exactly what I’m provisioning and how much it will cost.

After reviewing the article, it looks like I’ll need a Web App node as well as a SQL database for the backend. In order to put all of this together, I’ll want to create the following resources:

* Azure Resource Group – This is a logical grouping of managed resources. It makes it easier to organize your nodes and identify which are related and dependent on each other. Also, in the event of any relevant notifications from Microsoft about impacts or changes to a region, you’ll want to know which one your resources are in.
* Azure Storage Group – This is a shared storage pool that can be used by any of your Azure nodes that require it.
* Azure Virtual Network – This isn’t truly required since we won’t be doing any network design or provisioning, but some of the nodes will require that one be set.
* SQL DB + DB Server – These will be PaaS (Platform as a Service) nodes to host my database.
* Web App – This will be another PaaS node to host the actual app.

I’ll begin by logging into the Azure portal and creating the Resource Group. You do this from your portal dashboard and clicking Resources Groups in the left sidebar then Add.  Choose an appropriate name, which subscription you want it to belong to, and where you want the Resource Group to be located.  The location may be relevant depending on where your customer base is for purposes of latency, etc.

RGCreation

Once the resource group is created, I’ll want to create a Storage Group. It can be more economical to use a shared storage group rather than many individual storage groups for each node. Additionally, you have more options for selecting the redundancy/fault tolerance of the storage as well as options for speed, etc.

To create the storage group, navigate to the Resource Group and click Add. A search window will pop-up where you can search for any of the myriad of nodes available in the Azure catalog. Select Storage Account and when prompted select Resource Manager for your deployment model and click Create.

CreateFromRG

StorageCreate

You’ll be prompted for the parameters to be used for your storage account. I will pick Locally Redundant and disable Diagnostics. Also, I’ll be selecting the Resource Group created in previous steps. When selecting your storage parameters, the amount listed for pricing is per month/100GB. You should only be charged for what you actually use so the cost should be pro-rated for the month.

StorageAccountParams

Next, I’ll create the Virtual Network. Follow the previous steps of navigating to your Resource Group and clicking Add. This time, type Network for your search criteria and select Virtual Network. As before, select the Resource Manager option and click Create.

For my parameters, I’ll be choosing an appropriate name and selecting my existing Resource Group and Location. Once this is selected, click Create.

NetworkParams

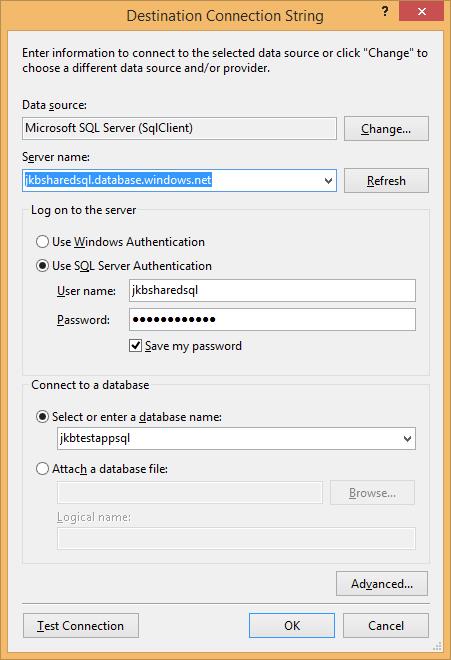
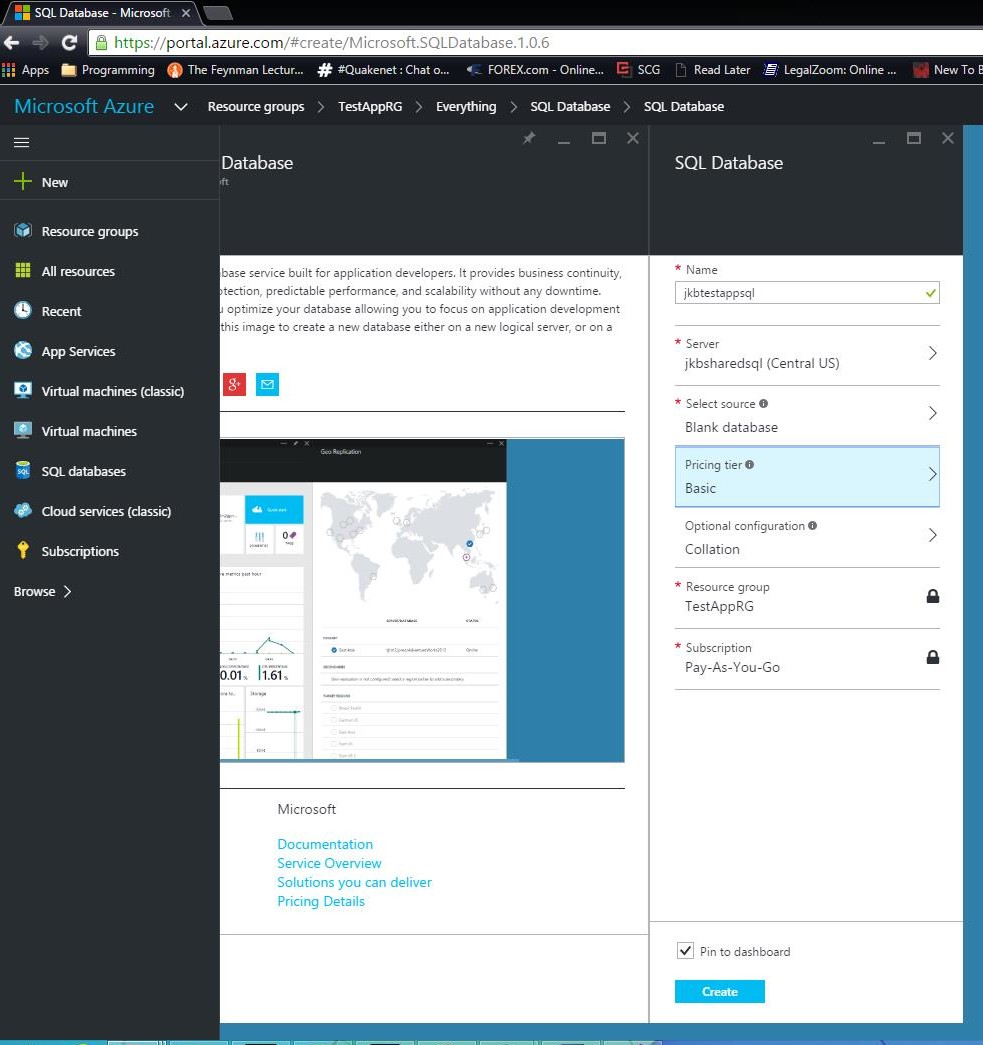
The next step, creating the SQL Server and DB, will be a bit more complicated but will follow the same basic pattern. As before, go to your Resource Group and click Add, then use SQL as your search criteria. The type of node you’ll select to create will be SQL Database. Once you’ve selected that option, click Create.

SQL DB Create

Inside of the SQL Database create panel, you’ll have an option to select your Server. Since we don’t have a server yet, our first step will be to create one. Click in the Server panel and then select Create a New Server. When creating a new server, you’ll choose an appropriate SQL Server name as well as creating your SA Account and password.  You’ll also select a location for the node.

SQL DB Params

SQL Server Params

Now that we have our Server, we can finish creating our DB. You can select an existing DB backup to map from or even use the sample Northwinds database. I’ll be selecting Blank DB for this example. There are a large number of pricing options to choose from for your DB performance and sizing options. Select the one that’s most appropriate for your app. Your subscription and Resource Group options should auto-populate. Once you’ve selected your options, click Create. The SQL DB creation takes a few minutes.

SQL DB Params 2

Lastly, we’ll need to provision a Web App node to host the actual app. Again, from your Resource Group, click Add and use Web App for your search criteria. Select the Web App option and click Create.

Web App Create

Once inside the creation dialog, you’ll choose an appropriate name for your app as well as confirm that your subscription info and Resource Group is correct. The last thing you’ll do is select a Service Plan. This is a configuration that can help you standardize your pricing and performance expectations for multiple apps. If you’re doing large scale or automated deployments, these can be useful to have for future tasks.

Under App Service Plan, click Create New.  Inside of the App Service plan creation panel, choose an appropriate name for the plan.  Under pricing options, you have various levels of availability and performance. Select the one most appropriate for you.  Again, rates are for the month and pro-rated for actual usage.  So, if you take your app down periodically or only need the services available at certain times, you can bring them down in the Azure portal and you should save that cost.

Web App Params

If you’ve completed all the above steps, then congratulations!  You’ve successfully provisioned your first Azure environment and are ready to deploy an app!

My next post will cover the creation of the project as well as the deployment steps.  If any of you have suggestions around provisioning in Azure or have any questions or comments, please feel free to add them here or address them to john@benedettitech.com.

Thanks for looking in!

Registering for an MSDN/Live Account and installing Visual Studio Community

In order to use my Azure trial, I’ll probably want a local copy of Visual Studio to build and publish content. In order to download Visual Studio Community (formerly Professional), I’ll need a Microsoft Live account eligible for the IDE. The good news is that in order to start my Azure account, I had to register a Microsoft Live account anyway. So, I’m halfway there.

Next step will be to log into Visual Studio with my live account: Link  Then click the Free Visual Studio option in the upper right and elect to join Visual Studio Dev Essentials.

VSDE

This brings up a page full of Microsoft tools. While I might have to come back to some of these later, right now I want to click the Download button under Visual Studio Community. This brings me to a download screen for the installer. Once that’s downloaded, I’ll run the setup.

DEHome

VSCdl

The setup wizard is pretty standard Microsoft boilerplate. Accept the defaults and next through. The wizard will install any dependencies your platform is missing, so you might be in for a bit of a wait and maybe a reboot or two. Once it’s finished, you’ll have the IDE installed and ready to go!

installwizard

Done

Another thing you’ll want for Azure is the Azure SDK. This has template for projects that are Azure specific as well as other useful plug-ins for Visual Studio. It can be installed at this link : Link  Select the SDK most appropriate to your installation. (VS 2015 for me)

SDKdl

One dependency that was required for my install was SQL Server Data Tools 2015.  This can be installed either by selecting custom options during your installation or by going back into the install wizard (Control Panel -> Programs & Features) and selecting the option.  As with all things, your mileage may vary depending on your environment.

SSDT

Once you have the IDE installed and are authenticated inside of Visual Studio, you will be able to publish content to Azure resources or nodes associated with your subscription.

If any of you have any questions or comments, please feel free to add them here or address them to john@benedettitech.com.

 
Thanks for looking in!

Finding a host for .NET/MS applications

One of the questions you might ask yourself is, where can I host stuff online.  My personal experience with 3-party hosting (including this blog) has been limited entirely to LAMP stack providers.  While these providers are fine for general website hosting, none of them have offered an option for hosting .NET web applications.  So, if I plan to build and host web content written in C# and other .NET languages, I’ll need to find a suitable provider.


Luckily, some quick Google-Fu turned up a Hosting Provider Directory right on ASP.NET :  Link


My goal here was to identify some low-cost providers that might be suitable for sandbox or Proof of Concept style tinkering.  Basically, something that would let me experiment as an individual without breaking the bank.  I’m not looking for high performance or a beefy server, just somewhere to take things out for a test spin.  Some things I’ll want would be a host that supports a current .NET framework and with a DB backend (MS-SQL would be great but I could live without it).


Here are a few examples of what I found:


Arvixe : Link


arvixe

Arvixe showed up as a top contender in a couple of online reviews.  After checking out their website, it looks like they offer everything that I might look for at a cost of $5/month.  Certainly something worth looking into.


WinHost : Link


winhost

WinHost has shown up in a lot of ads for me lately so I decided to take a look at their offering.  Their Basic Plan price was $3.95/month but they require a 2 year commitment in order to achieve that price.  Additionally, they only offer a single site and a single DB.  In order to move beyond that, I’d have to commit to their Max Plan which is $7.95/month.


Azure :  Link

azure

This is where I’ve been spending a lot of my time lately.  Azure allows the customer to pick and choose all of the components that go into an environment and pay for as little or as much as you like. Individual nodes and other infrastructure can be provisioned at will and there’s an estimated monthly cost for each item as they are provisioned.  While I do like the idea of paying for dedicated and infrastructure on-demand, I am a little daunted by the pricing, as even a Basic server costs $55/month by itself.


If you’re interested in an itemized catalog of Azure offerings, here’s a link to their pricing calculator : https://azure.microsoft.com/en-us/pricing/calculator/


To me, the interesting thing about Azure hosting is that they offer an upfront trial ($200 credit) for any user.  Additionally, you are only charged for when your resources are actually used.  So, if you take a server that’s ~$50/month to run, but only run it for a fraction of the month, you might very well come in under the other options listed below.   Not ideal for a commercial website that needs to be up 24/7, but might be just fine for the occasional evening of tinkering.


So, I’ve opted at this time to start a trial account of Azure and see how it behaves for my purposes.  I’ll post a follow up on this at the end of the trial.


If any of you have ideas for .NET hosting or have any questions or comments, please feel free to add them here or address them to john@benedettitech.com.


Thanks for looking in!